Table of Contents
 This Page Contains Out of Date Material and Needs Updating or Revising; Not Flagged for Removal
Spine Label Printing
Contributed by Elaine Hardy
Spine and pocket labels can be printed from several places in Evergreen, depending on the needs of your workflow. You can print labels, either single or multiple, as you add your copies to a record or you can batch print labels at any time after the copy is added.
Before you begin printing labels, you need to make sure your computer is set up to print with the necessary label stock and with the proper printer settings both in Evergreen and in Windows. You may need assistance from your local system administrator or IT people in order to get your computer set up for printing. You may also need to experiment until you find the correct settings for your printer. These directions should help guide you through the process.
Evergreen spine label printing has been tested and the defaults set for an OKI MICROLINE 320 Turbo 9 Pin Printer using SP1 (one spine label) stock. The driver needed for this printer is already included with WindowsXP. The driver will be labeled “Oki Data ML 320 Turbo/D (DEC)” in Windows. If your operating system differs, go to http://okidata.com/, click on their “Drivers” link and choose “Dot Matrix Printer” for their technology field and “ML320Turbo-D” for the printer model, and then proceed to find the correct driver for your operating system.
Initial Setup
Create Custom Forms in WindowsXP
You will need to create a custom form or page type for your label stock and link them with your printer before setting up printing in the Staff Client.
SP1 Label Stock
- Click on Start→Printers and Faxes→File →Server Properties (or right click anywhere on blank space in the Printers and Faxes window and click on “Server Properties”).
- Check “Create New Form.”
- Under Form Description (Measurements), make sure English Units are selected.
- Set the “Form name” to “sp1” (or another name of your choosing).
- Type in the following measurements (these seem to work for most label stock):
Width: 3.00	Left: 0.00	Top: 0.00
Height: 2.00	Right: 0.00	Bottom: 0.00
- Click “OK.”
Other Label Stock
- Click on Start→Printers and Faxes→File →Server Properties or right click anywhere on blank space in the Printers and Faxes window (see above).
- Check “Create New Form.”
- Under Form Description (Measurements), make sure English Units are selected.
- Type in the following measurements (these seem to work for most label stock):
Width: 5.00	Left: 0.00	Top: 0.00
Height: 1.50	Right: 0.00	Bottom: 0.00
- Give your form a name (like Labels or Spine labels) and click on “OK” to save your new form.
- See below to link newly created form to your printer.
Linking the Printer to the Custom Form in WindowsXP
- Click on Start → Printers and Faxes.
- Right click on your printer and choose “Printer Preferences.”
- Choose “Paper/Quality” tab.
- For dot matrix printer, choose tractor feed at drop down menu.
- Click “Advanced.”
- In the Paper Size field, choose your custom form, “sp1” or your custom name.
- Click “Apply” and “OK.”
Settings for Evergreen Staff Client
Setting Up a Label Printer in Evergreen
- In Evergreen, go to Admin→Local System Administration. Then, under “Workstation Configuration,” choose “Printer Settings Editor.”
- Click on “Set Default Printer and Print Test Page” button (make sure your printer is off if you don’t want to print a test page).
- Pick the correct printer, probably Okidata ML 320 Turbo/D (IBM).
- Click on “Properties” and make sure “tractor feed” is chosen.
- Click on the “Advanced” button and at “Paper Size” choose your new form.
- Click on “OK” twice to set changes.
- Choose “Page Setup” from the printer settings editor.
- Choose the tab “Margins & Headings/Footer”, set the left margin to .2” and click “Ok.”
Adjusting Settings in the Spine Label Interface for Label Stock
- Pull up an existing record in Evergreen.
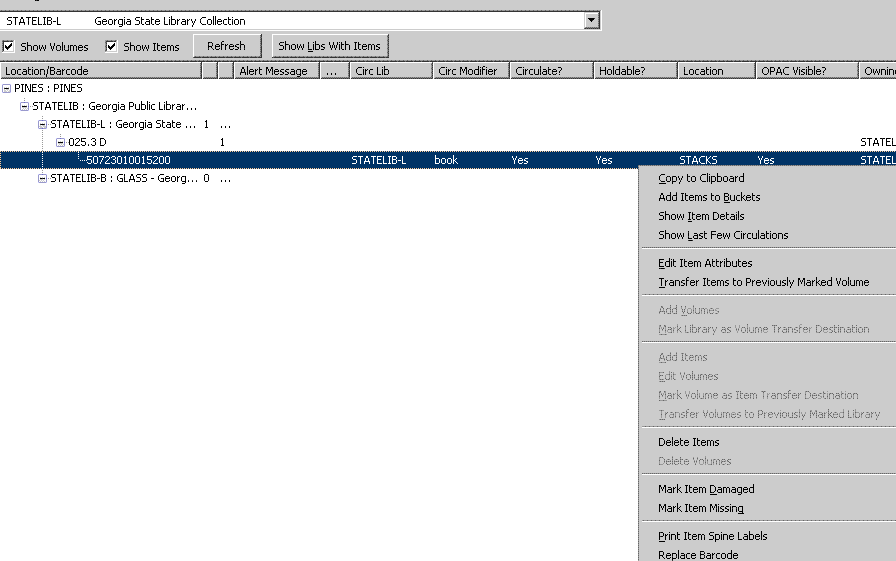
- In Holdings Maintenance, highlight an item and, either from the actions for selected rows menu or right clicking on the item, choose “Print Item Spine Label”.
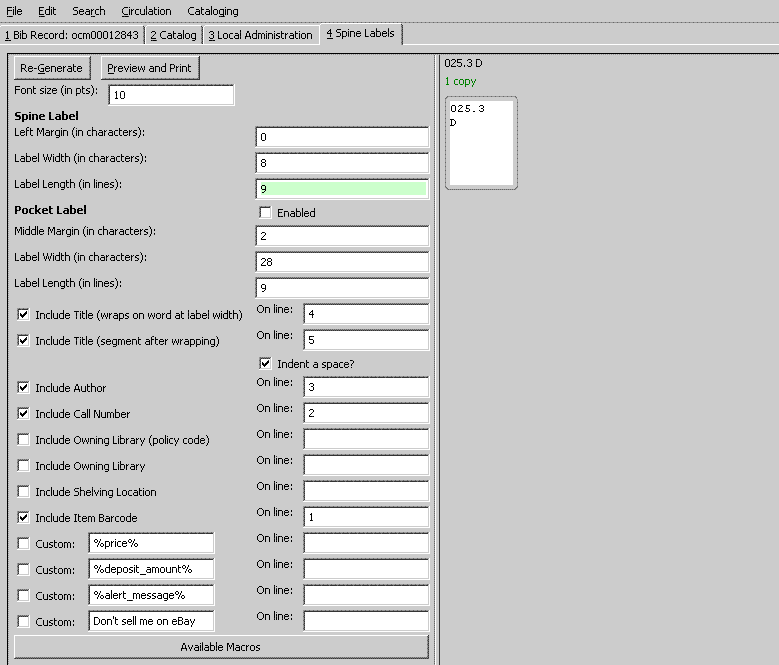
- The spine label printing interface will open in a new tab:
- For SP1 labels, set
Font Size to 10
Left Margin to 0
Label Width to 8
Label Length to 9.
For other label stock, you may need to experiment with different settings to find the correct left margin, width and length. Common settings are:
 Left Margin 6
Label Width 8
Label Length 6.
- Click on “Regenerate” to save changes and to reset label to those settings.
- Click on “Preview and Print” to print labels and test settings.
If the printer skips a label first adjust the label length. If it is off by one, it can cause the printer to form feed multiple labels. If this does not solve the label skipping, go back to the Printer Settings Editor and:
- Click on the “Page Settings” button
- Choose the “Margins & Header/Footer” tab
- Set the top margin to 0.1
Printing Spine Labels
Spine labels may be printed when initially adding Volumes or Copies, for existing Copies from the Holdings Maintenance Interface, or in batch for items by barcode.
Printing as You Add Volumes/Copies
In order to print spine labels as you add volumes and/or copies, make sure the “Print Label” box for printing spine labels is checked on the Volume/Copy Creator page before you click on “Edit” or “Create”:
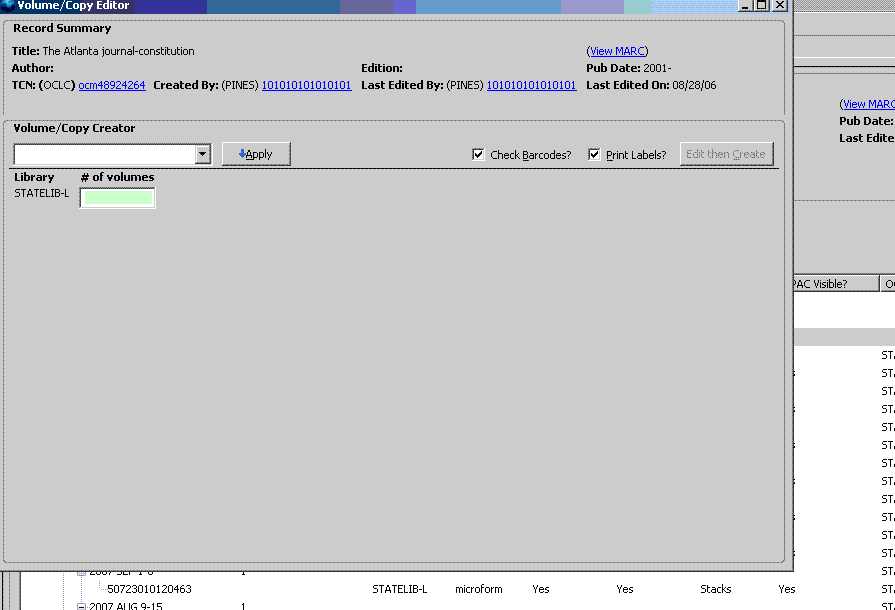
After you have added your volumes/copies, the spine label interface will launch, allowing you to edit and print the spine label(s):
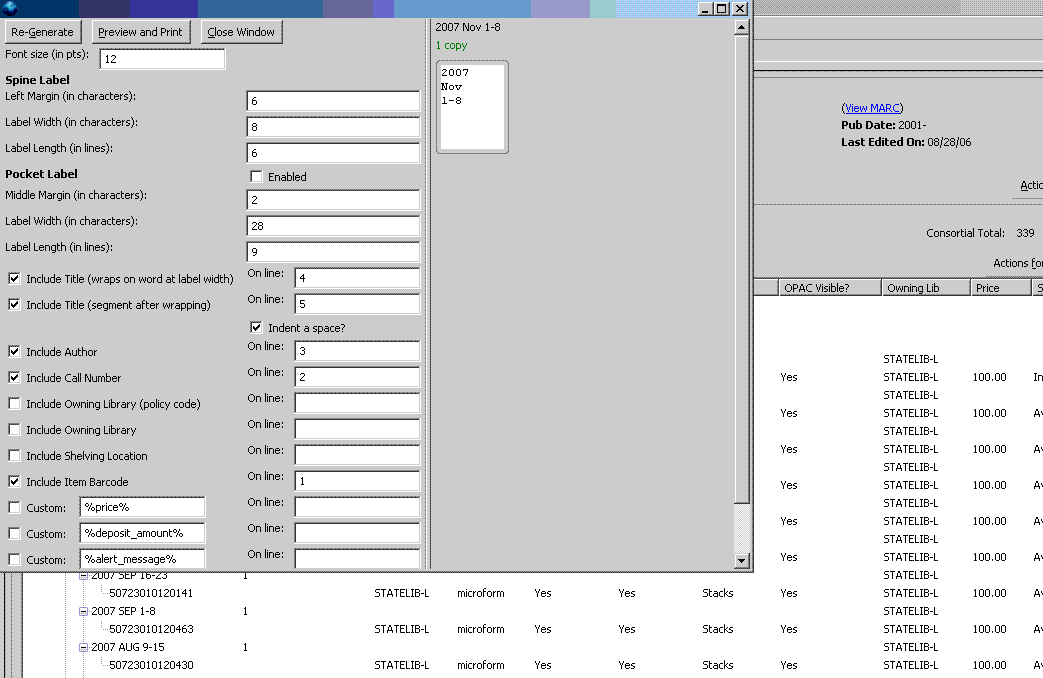
If you make any changes to the font size, margins label width or length; you will need to click on “Re-Generate” to apply those changes.
The “Close Window” button closes this window without printing (or saving changes if you have not regenerated the label display).
You can edit the call number at this point so that it fits on your label and the spine of the book, wrapping long call numbers as needed. Click on the line to be edited and the box will highlight in green. The call number associated to the item record will not be changed by any editing you do at this interface. For convenience, the call number is above the editing screen, along with the number of copies of label to be printed.
If you have added multiple volumes or copies, your screen will look more like this:
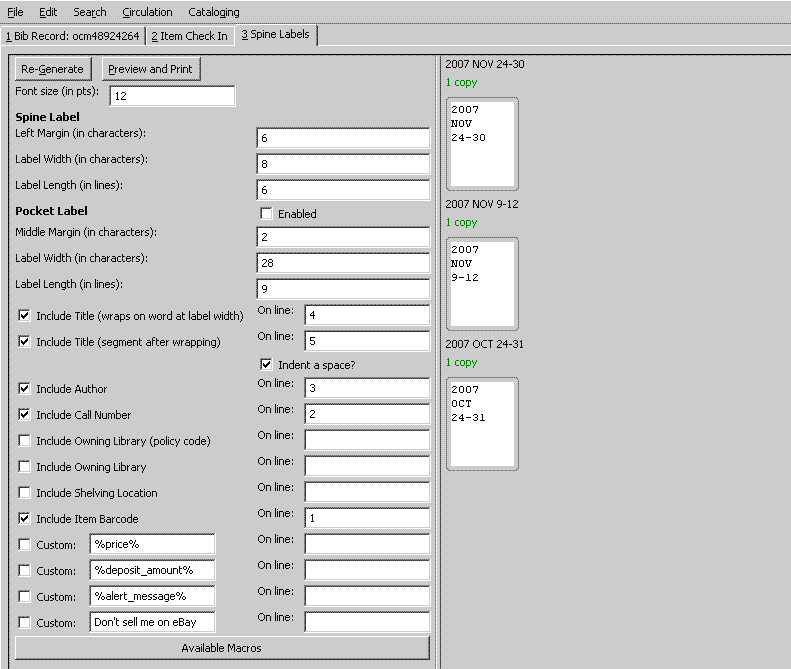
Illustrated in the window below, are labels for multiple copies on each of two volumes added and a single copy added on another. Three label mock-ups are displayed, but over each is the number of labels for that call number that will be printed.
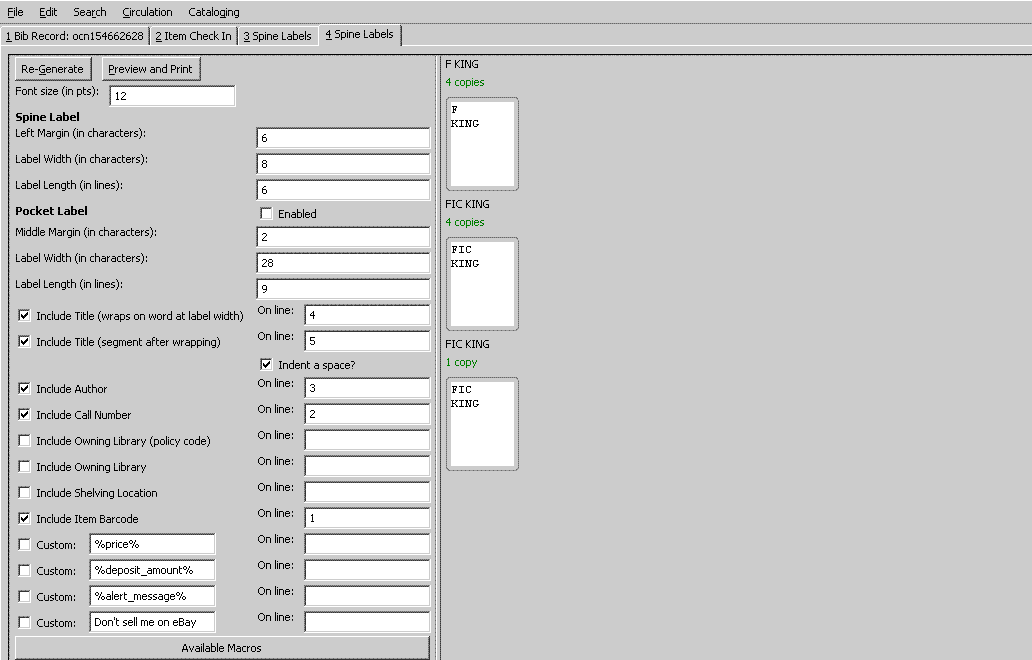
When you are ready to print all the labels, click on the “Preview and Print” button. A page showing the print layout will be launched:
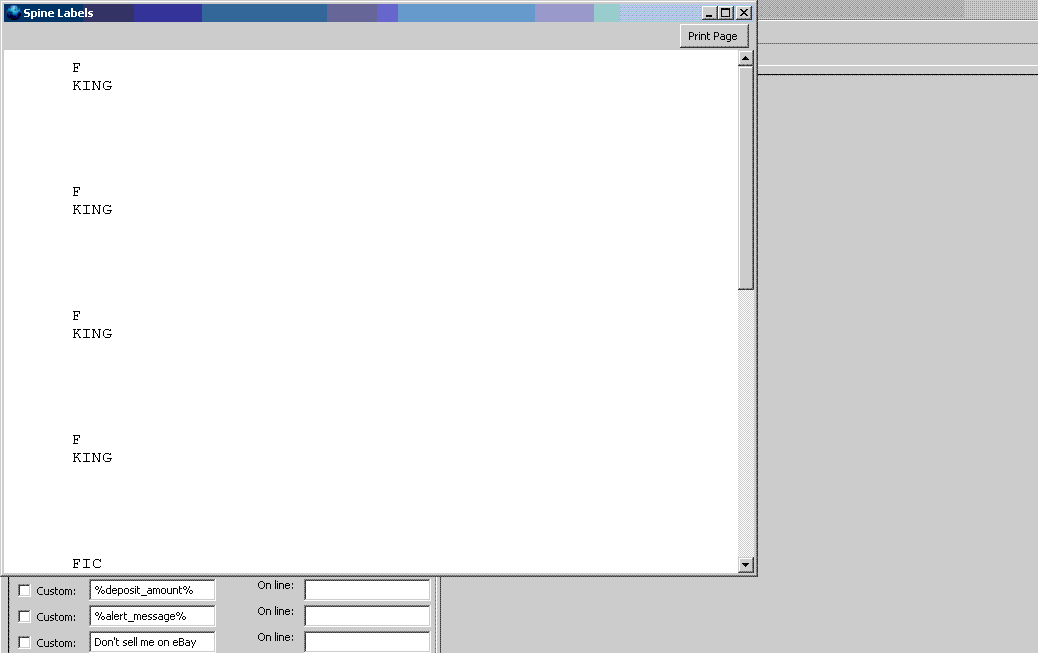 You can scroll down and check the layout of your call numbers. If you see a problem, close the window without printing by clicking on the “X” in the right hand corner. Make any changes you need and launch the preview pane again. When you are ready to print, click on the “Print Page” button.
The printer dialog box will open. Verify it is set to the correct printer and click “OK”. Your label(s) should print.
Printing Labels for Existing volumes
For spine labels from a single title record, with that title record in holdings maintenance, you can print either one label or multiple labels. To do so, display and highlight, at the item level, the call numbers for which you need labels. If you need to print labels for items in a direct line, highlight either the first item, volume or library name and then, while depressing the SHIFT (or CONTROL/SHIFT) key, left click on the final item. All items in between should be highlighted and the Print Spine Labels action will only apply to the selected item rows, ignoring the selected non-item rows. If the items you need to print labels for are not contiguously displayed on the screen, hold down the CONTROL key as you left click with your mouse on each item. Only those item rows you click on will be highlighted and actionable by the command:
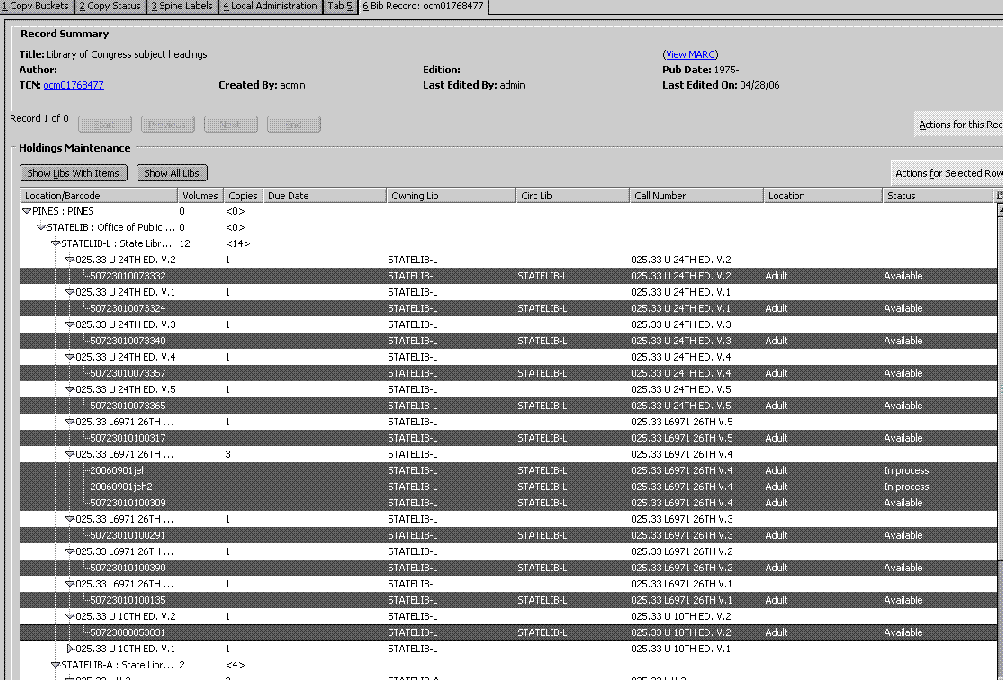
Then, either from the “Actions for Selected Rows” button or right clicking, choose “Print Item Spine Labels”
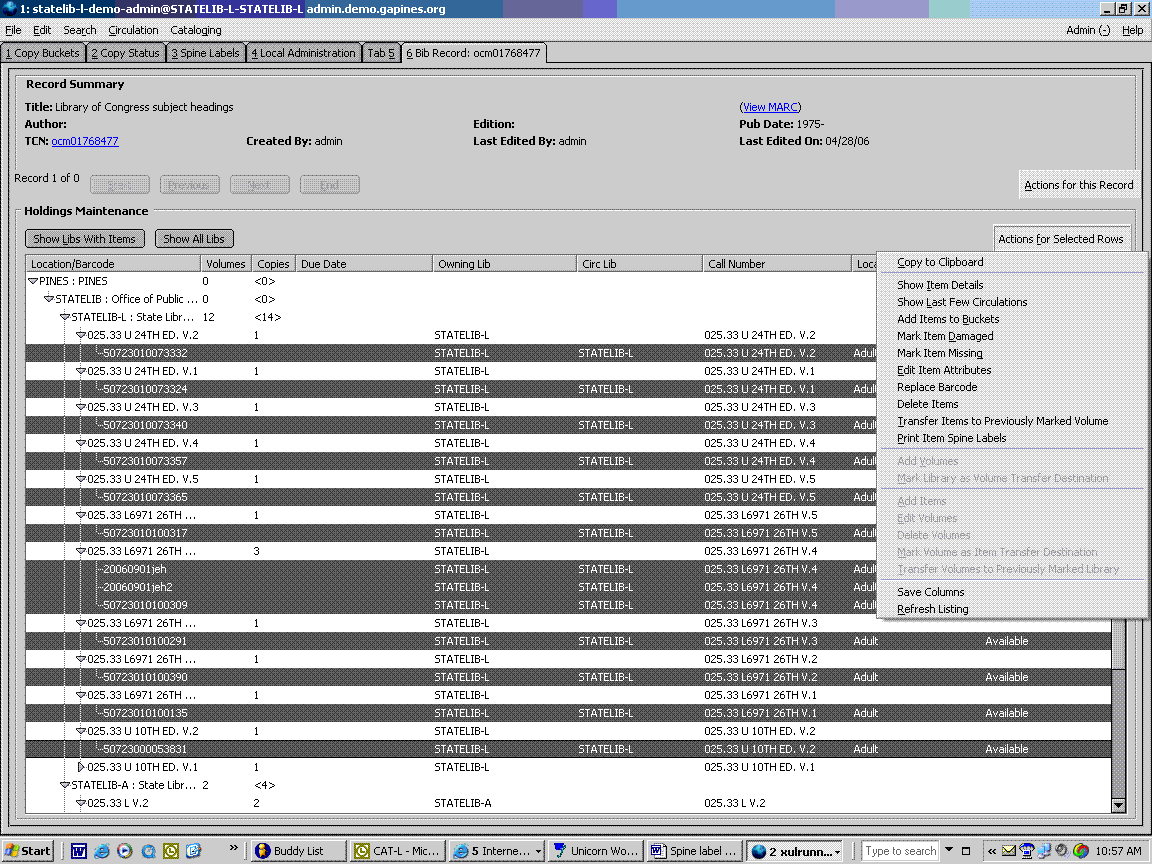
A new tab with the spine label dialog window will launch. Instructions are the same as in printing as you add volumes/copies from this point.
Batch Printing
Using Status Interface
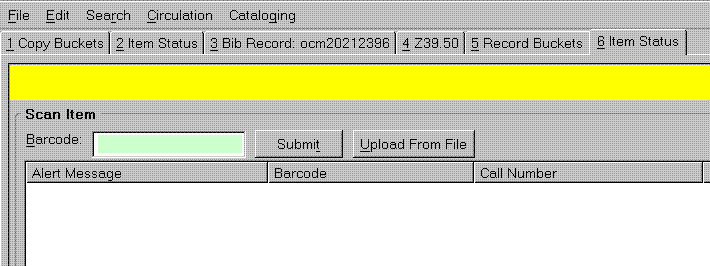
Evergreen allows for batch printing labels for more than one title record at a time after items have been added using the “Item Status” interface. There are several ways you can add items to this display. The most direct way is to open the interface by either going to Cataloging→”Display item,” pressing F5, or going to Circulation→”Show Item Status by Barcode”. The display will open in the tab you have on top.
- Open the Status Interface by pressing F5.
- Scan or type in each barcode, clicking on the submit button or pressing the enter key after each one (unless your scanner is programmed with a carriage return).
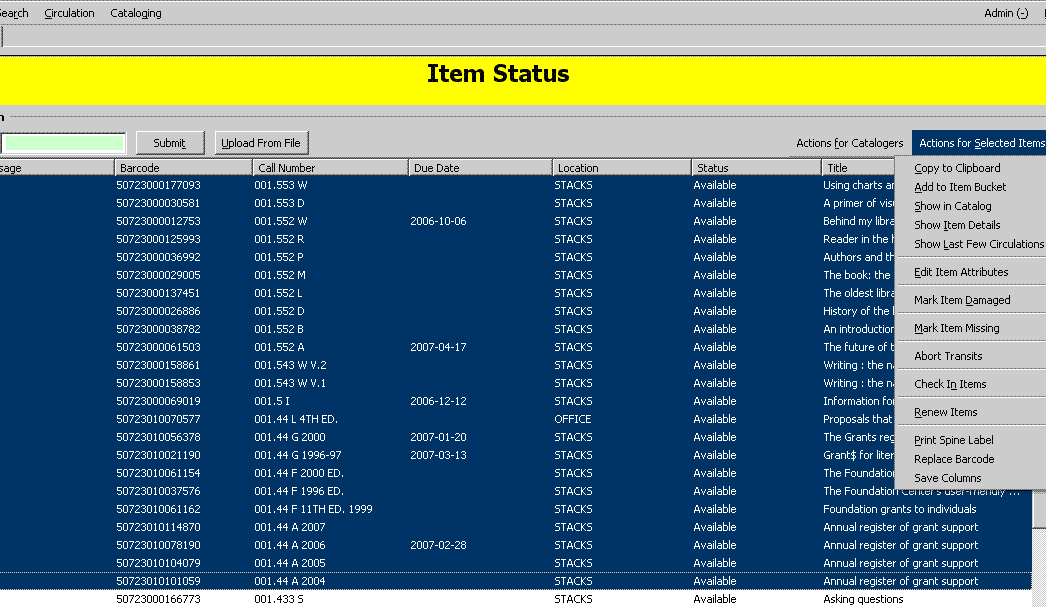
- After you have populated the display with all the items, select them all by left clicking the first one and then SHIFT+CTRL+ left-click or SHIFT+left-click on the last entry.
- The spine label interface will open in a new tab. From this point, follow the directions for printing from above.
Using Copy Buckets
You can also add items to a Copy Bucket and move them from the Copy Bucket to the ”Copy Status” interface. This may be useful when you know which existing items need new spine labels but they are not in hand. For example, you want to print the labels and send them to a branch to be placed on the items. You can also have the branch library scan in the barcodes from the items into a shared copy bucket.
Adding Items To Bucket From Holdings Maintenance
In holdings maintenance for the title record, select the items you need. Right click or use the “Actions for Selected Rows” menu and choose “Add Items to Bucket”. A dialog box will open. Either create and name a new bucket or pick an existing bucket to use. If you add to a new bucket, be sure to give it a distinctive name. You can also make a shared bucket. Continue adding items as needed from different title records. When you are done, open your copy bucket by going to Cataloging→”Manage Copy Buckets”. Open your bucket. Click on “Show Status” from the Batch options. 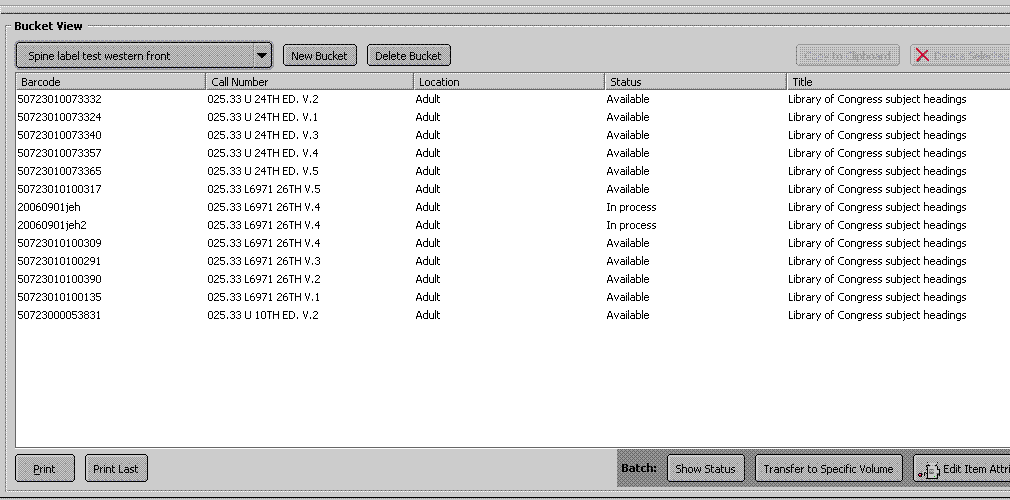
The “show copy status” display will open in a new tab. Follow the directions for printing spine labels above.
From Status Interface
If you have a project to change call numbers at a branch, but don’t need to see the items (perhaps you are adding a new prefix or combining your short story collection with your regular fiction), you can have a branch add the items to a shared copy bucket by scanning them into the Item Status Interface (reached by F5).
After changing the call numbers in the record (it is always best to have the item in hand; however, the realities of workflow may mean that you cannot), you can then transfer the bucket to the display item interface, print the spine labels and send them to your branch for them to match them with the items and replace the old labels. Care does need to be exercised with a project of this scope since it would be very easy to put the incorrect label on a book.
At the branch, someone first scans the items into the display item interface. They then select all the items and, under actions for selected items, choose “Add to Item Bucket:” 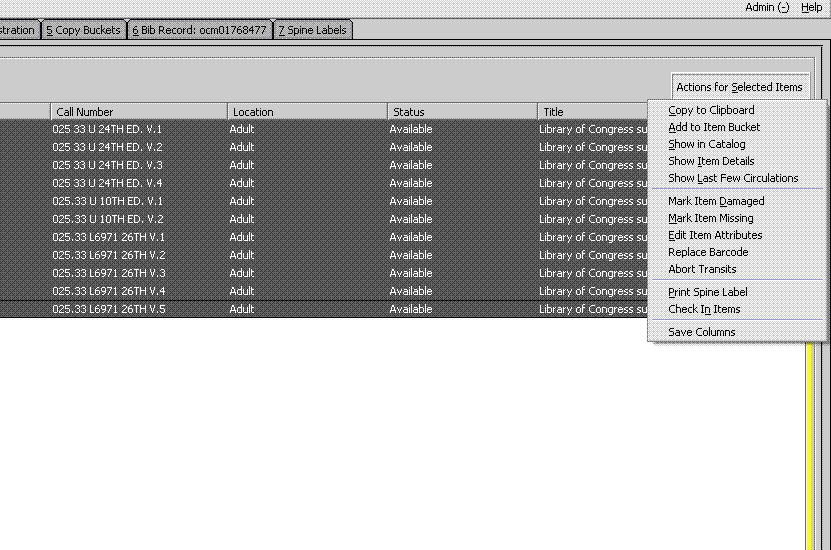 The items can then be added to either a new shared bucket or a previously created one.
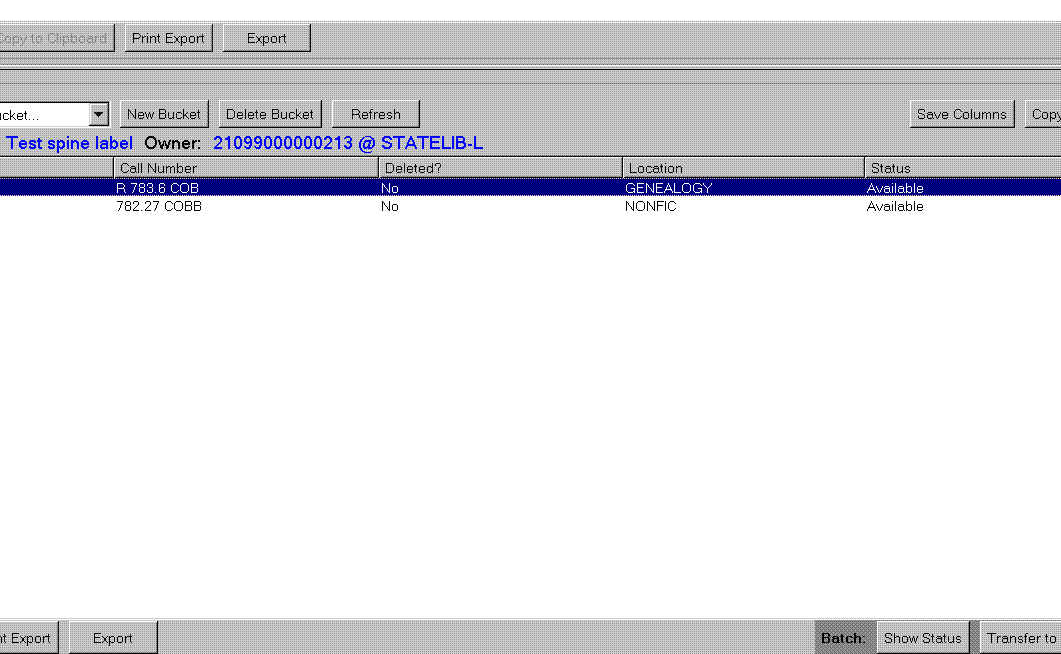
From this bucket, you can then transfer the list to the Item Status interface using the “Show Status” button:
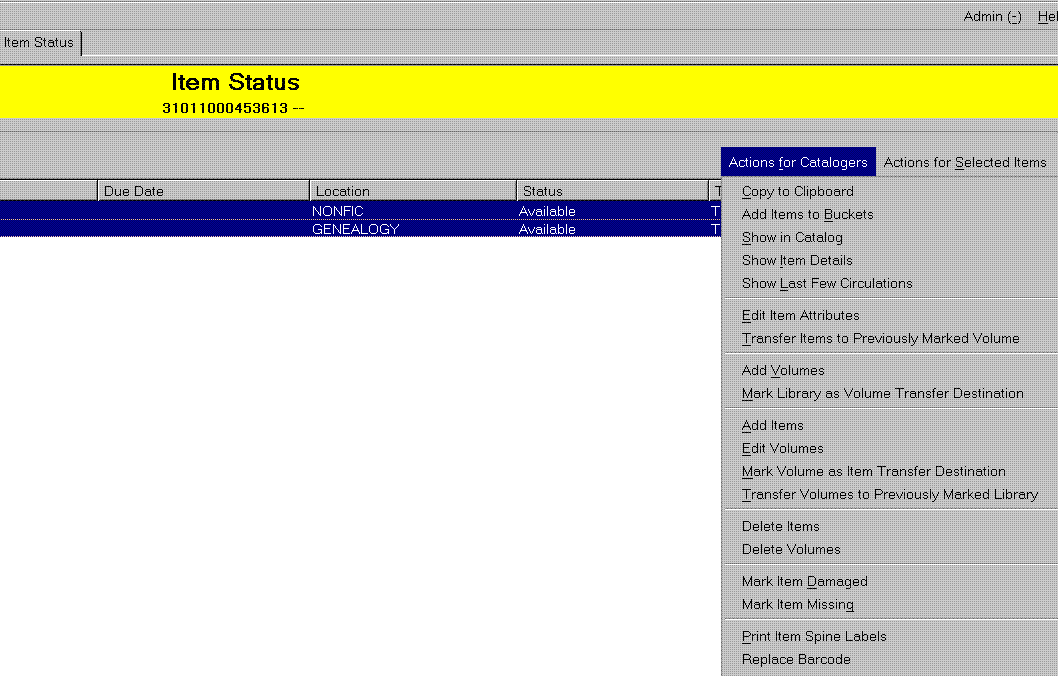
 Depending on the kind of editing you need to do to the call number, you can either edit from here or pull up each record in the catalog and edit from Holdings Maintenance. To edit from this list, highlight the items and then, from the “Actions for Catalogers” button, choose “Edit Volumes”:
 When finished, click on “Modify.”
After you’ve edited all the call numbers, you can then follow the directions above to print out the labels.
You can also create a text file (txt) of barcodes rather than using the Copy Bucket and upload the file into the Item Status interface.
