Table of Contents
Reports: ILS User templates
Getting started
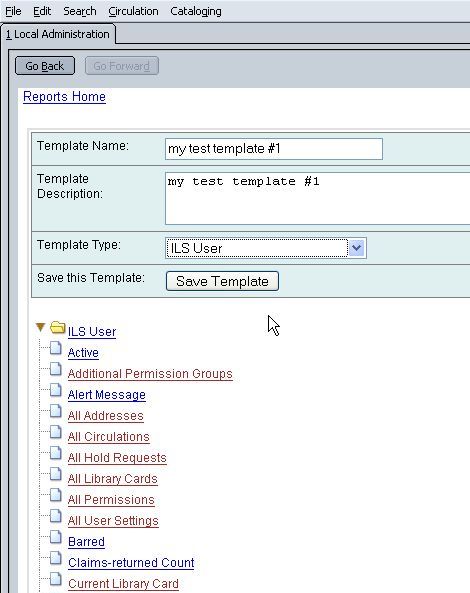
First, let's click on one of our sub-folders under the main Templates folder in the "My Folders" box. Then click on the "Create a a new Template for this folder" link. Let's fill in the Template Name field and Template Description fields with something like "my test template #1". Let's change the Template Type dropdown menu to "ILS User". At this point the fields and entities available for filter/display should change and look something like this:
A folder appears labelled "ILS User". This is the main "entity archetype" that the ILS User Template Type reports on. The contents of that folder are mostly fields/attributes found directly on users (patrons and staff), but some represent relationships to other entity archetypes, such as Addresses, Libraries, Stat Cats, and Circulations.
Those entities in turn have their own fields and relationships, and it is very possible to drill down through the menu heirarchy recursively without end.
For example, the "All Circulations" field under "ILS User" is a relationship between the patrons and all their circulations. That relationship has a field called Patron, which points right back to an ILS User entity (one that is subtly different from the original ILS User entity, by virtue of representing users that circulated items, whereas the original ILS User entity represents all users regardless of whether they've had any circulations yet or not). So you could go ILS User -> All Circulations -> Patron -> All Circulations -> Patron -> etc. over and over. Don't do that. :D
Now, I want to emphasize that this ILS User doesn't necessarily refer to a specific user. There are different ways to think of it: it's an archetype, or a definition of the concept of user, or a table in the database. What it does is reference ALL users by default. For your report, you most likely don't want a list or count of all users in your consortium, so we need to add some Template Filters.
Display and Filters
Two of the more obvious candidates for filters would be a user's Profile group (so we can distinguish between patrons and staff) and a user's home library. Let's start with the Profile.
Group Name field
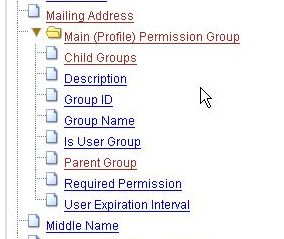
The exact field name we're looking for here is "Main (Profile) Permission Group". If we click on it, we find that it is actually an entity archetype (representing the concept of a permission group) with its own fields, and not a simple textual value.
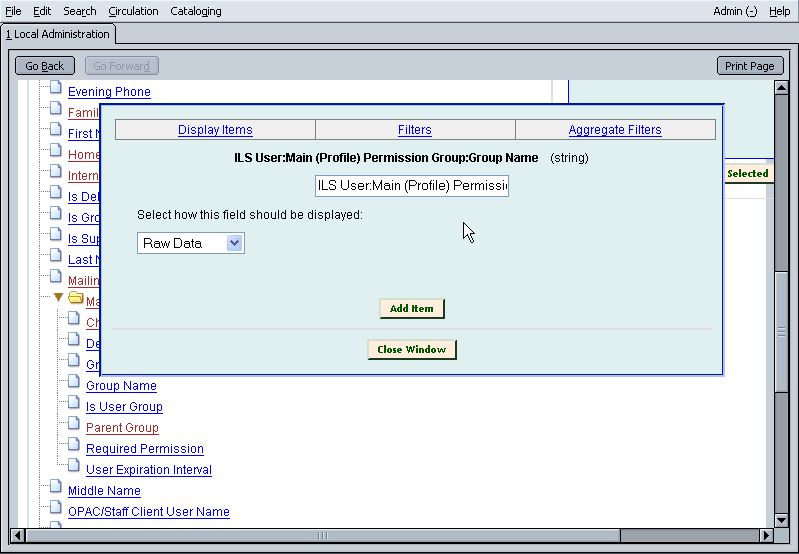
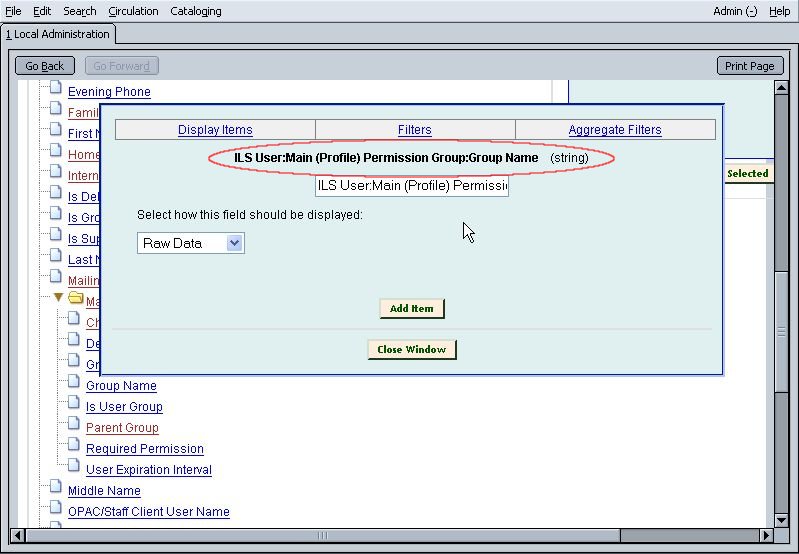
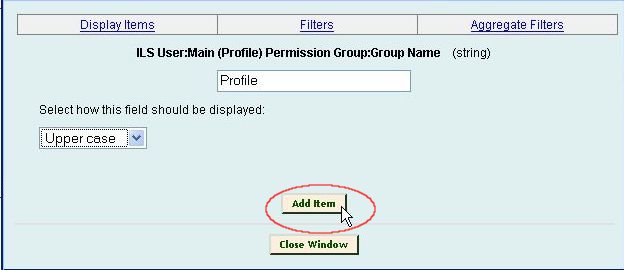
The simplest attribute of the permission group for our purposes would be "Group Name". So we click that link and see this interface:
Window for creating display items and filters
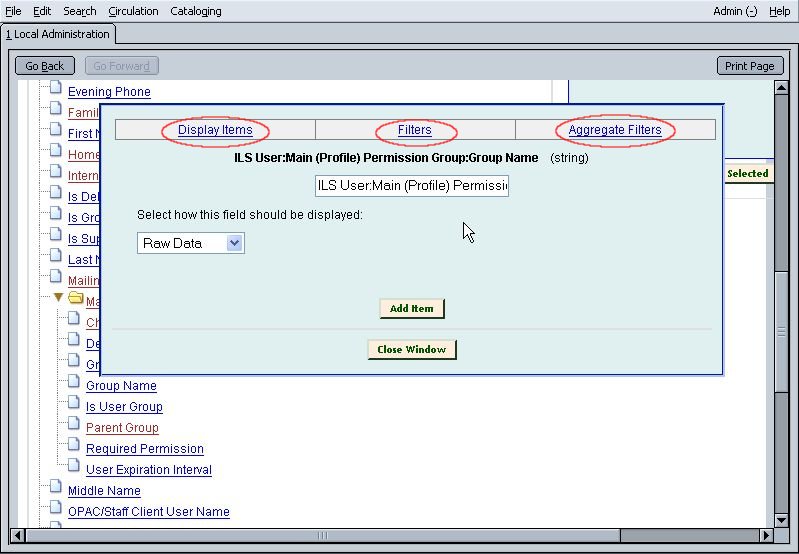
This interface has 3 sections: Display Items, Filters, and Aggregate Filters.
By default it shows the section for Display Items, but clicking on the link for any section will change the interface.
The "full path" and data types
In all 3 sections, the first thing shown is the field you selected and the type of value it refers to.
In this case we have:
ILS User:Main (Profile) Permission Group:Group Name (string)
This describes the full path or relationship between the main template archetype (ILS User) the field we selected (Group Name), and any intermediate entities, such as "Main (Profile) Permission Group", all separated by colons (a software programmer convention). The last thing in parenthesis is the type of data the field refers to. In this case "String". String is programmer speaker for "text". It refers to a "sequential string of characters" (don't we love how those wacky programmers let their crazy jargon slip into our environment, or for that matter, how those wacky technical writers pretend to be the audience they're writing for?). Other data types might include dates and numbers. The data type determines what options we have for "transforming" the values referred to.
Display Items
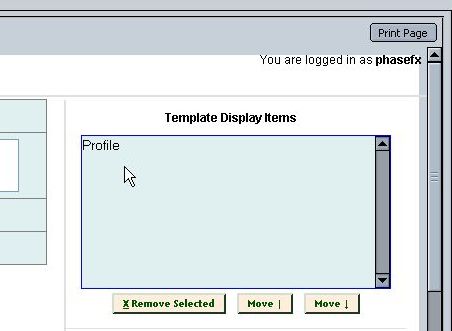
To illustrate, we definately want to display the Group Name in the final report output, so we can tell for example, if the results we're looking at deal with Out Reach patrons or Non-Residents . If we simply clicked "Add Item" here, this would add the Group Name field as a column in the final spreadsheet. It's not obvious when you click that button, but back in the main Template creation interface, the "full path" of our selected field gets added to the box in the upper right labelled "Template Display Items".
Transforms
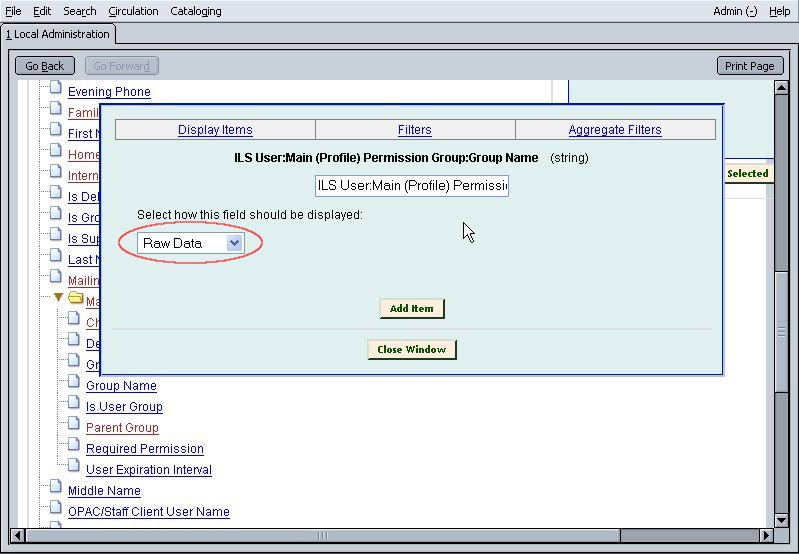
But let's not click the button quite yet. Part of the Display Items interface is mentioning something about "Raw Data".
This a drop down menu, and the options aren't very exciting for "strings", but we could choose "Upper case" here, for example, and in the actual spreadsheet, all the values for that column would be displayed in capital letters. For strings and numbers, "Raw Data" is usually what you want.
Column Header
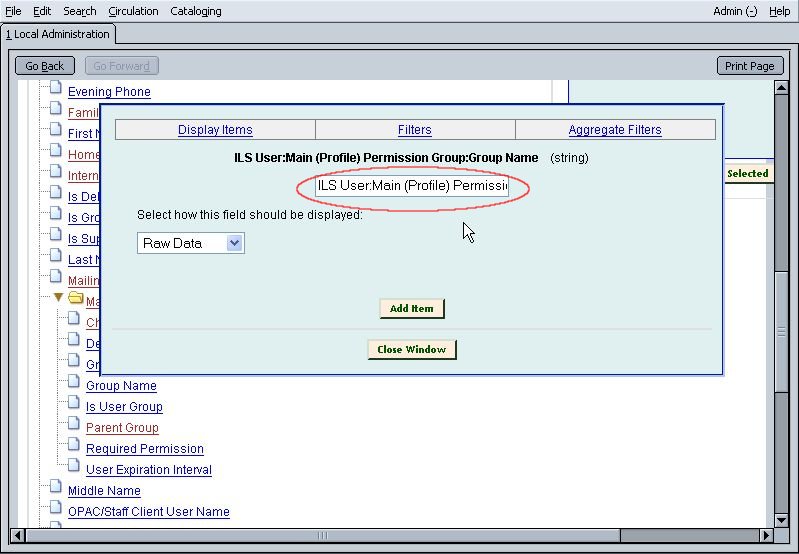
Speaking of that column, there is one final thing we can play with before we click "Add Item", and that's the text entry field underneath the "full path".
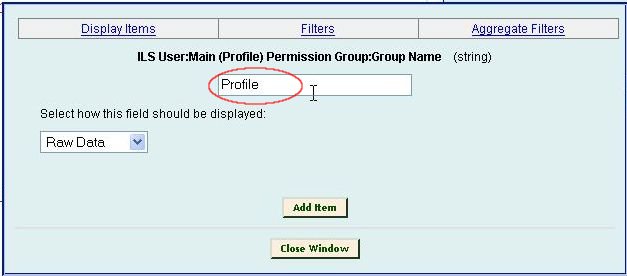
You can change the contents of that field to change the column header in the final spreadsheet.
On with adding a column...
So let's do this, and change the transform to "Upper case", and click Add Item.
If you were to close that window now and look at your template interface, you'd notice that the Profile column was added to the Template Display Items box, like so:
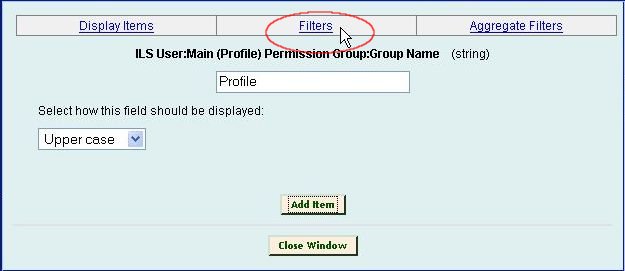
But instead, we want to continue with the Group Name field and create a Filter based off of it.
Switching to filter creation...
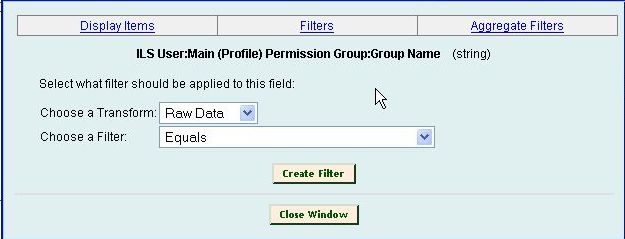
This time the "transform" is more prominently labelled. We'll leave it on "Raw Data" in this case.
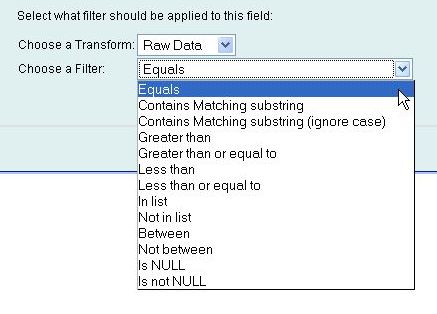
The "Choose a Filter" dropdown menu is more interesting:
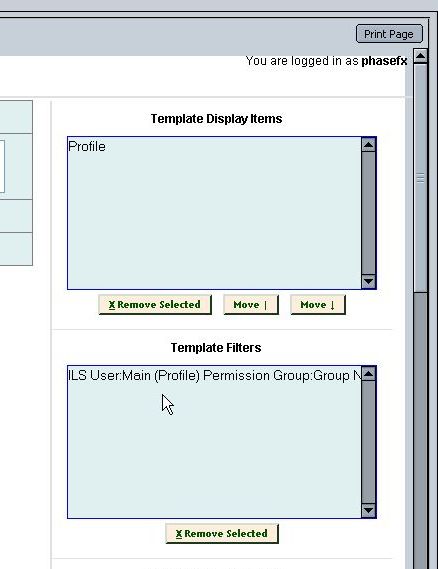
If were to click on "Create Filter" now, with the transform set to Raw Data and the Filter set to "Equals", then the box in the template interface labelled "Template Filters" would gain a new entry:
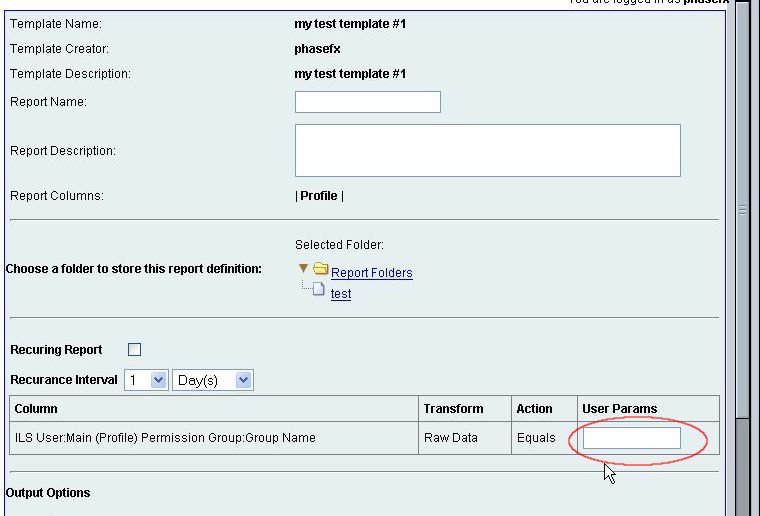
And if you were to go on and save this template and use it to create a report, that filter would look like this:
And you would be able to enter some text like "Patron" for just one Profile in the field I have circled above. If instead of "Equals", you were to use "In List", then the input widget would look like this:
And you could enter multiple entries like so:
But both of these are sub-optimal for our purposes. The report becomes vulnerable to typos, the data becomes tedious to enter, etc.
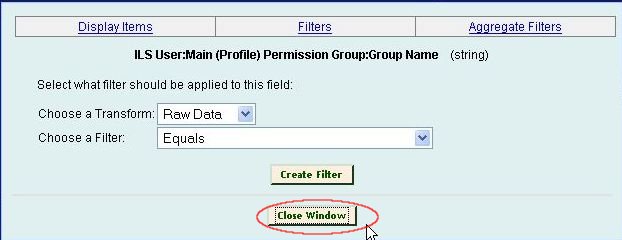
However, there is another field for the "Main (Profile) Permission Group" entity that can help us here. First, let's close the window for the Group Name field.
Closing the interface window for display items and filter creation
Deleting things from a template
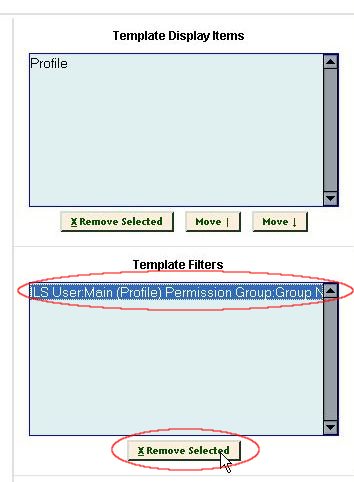
Second, if you've added some filters already and need to delete them, you can do that from the Template Filters box:
Group ID field
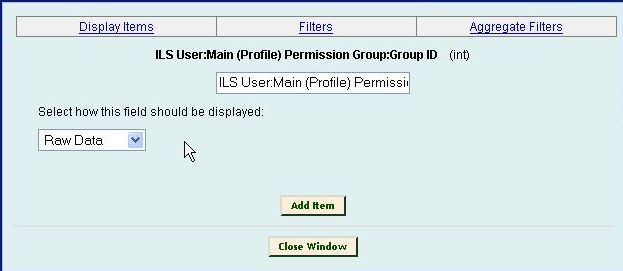
Now, let's click on the "Group ID" link (found under the ILS User and Main (Profile) Permission Group folders).
Almost everything in the Evergreen database is identified with a unique number. The "int" datatype shown here refers to "integer", which is a mathematical term which basically means a number without a decimal. This number is usually internal and not exposed to staff. In the examples above, we were trying to identify specific user profiles for the purpose of filtering, but we were doing it with the textual names of the profile groups. We could conceivably identify these profiles by their internal number (the Group ID), though that could pose a problem since as end users we don't know what the internal ID's are!
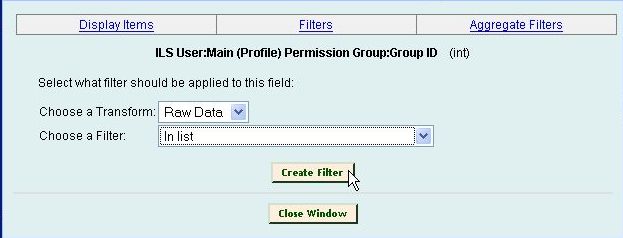
However, for some archetype entities (such as "Main (Profile) Permission Group"), the reporting system will handle the ID field in a magical way. Let's click "Filters" for the Group ID field, and leave the transform at "Raw Data". And for the filter type itself, let's pick "In List" again. So it'll look like this before we click the Create Filter button:
When creating an actual report from the template, this filter would end up looking like this:
And we could add specific profiles like so:
This is what we want, so let's go ahead and click "Create Filter" and then "Close Window".
Short (Policy) Name
Now, back in the "ILS User" folder, the next field we're interested in is "Home Library". If we click on that, we find that, again, it's not a simple text field, but another archetype entity in its own right, this time representing the concept of home libraries for the ILS Users we're filtering on.
The first thing we're going to do is add a display item (or column) for Home Lib for inclusion in the final report results. The field we're interested in here is "Short (Policy) Name". In PINES, that would represent such things labels as "ARL-ATH" and "WGRL-LS".
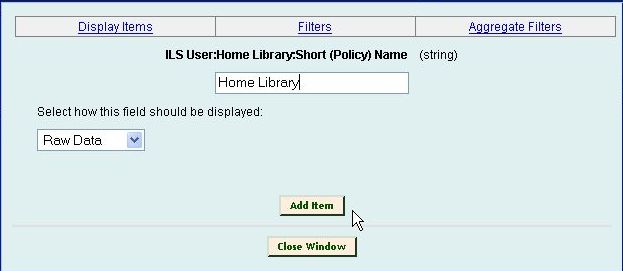
So we click on that field, leave the transform as Raw Data, and change the column name to something simpler, like "Home Library", and then click Add Item.
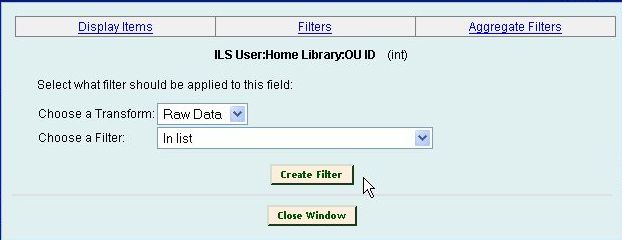
Now, we could try to make a textual filter on the name of the library, like we tried with the profile Group Name, but again, the reporting system offers us a convenience filter if we use In List on the internal ID. The ID field in this case is "OU ID". OU is an abbreviation for "organizational unit", which is our nice abstract way of saying "library branch, system, consortia, etc."
So if we close the previous window and click on "OU ID", choose "Filters", leave the transform as "Raw Data", and pick "In List" as the filter, like so:
If we then click Create Filter, in the actual report definition the filter widget will look like this:
Which is what we want, so let's do it. Our Template screen at this point should look something like this:
What we have so far...
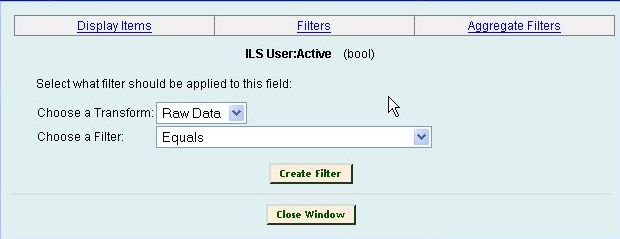
These two filters are enough for a simple patron report (we can filter out or select users based on their home library and their Profile). However, if you want to base a real report off of this, you should add a third filter for the ILS User -> Active field.
In Evergreen, staff can't truly delete patrons from the database, instead they have to mark them inactive.
The "bool" data type shown above refers to "boolean", which is a mathematical term referring to True or False.
So all users are either Active = True or Active = false.
If we create this filter, the resulting widget will look like this:
When a report is actually created from this template, you should make sure that filter widget is set to True, unless you want to report on inactive ("deleted") users.
But we still don't have enough display items for a useful report.
We have to decide if we want a maintenance style report, with a list of patrons, or a statistical report, with a count of patrons.
Lists
Let's start with a list first. With lists, it's really important to filter as much data as we can. The "ILS User" entity basically refers to the database table for users, which in PINES includes about 1.4 million active users. That probably wouldn't fit in an Excel spreadsheet. :) If we set our Home Lib filter to ARL-ATH when we make a report from this template, that would leave us with about 40,000 users. If we set our Profile filter to allow just NonResident, that leaves us with 218 patrons. That would fit in a spreadsheet, 1 row per patron.
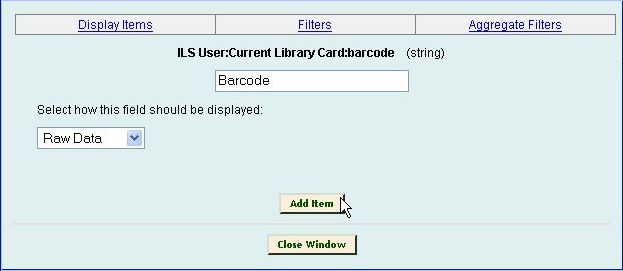
So with that example as our goal, now let's add patron barcode as a column for that spreadsheet. There are two likely fields listed under "ILS User" that we can look at. "All Library Cards" and "Current Library Card". The one we want is "Current Library Card", but it's important to note that deactived (lost) cards remain associated with a user, and you could get at those through the All Library Cards relationship if you needed to.
If we click on "Current Library Card", we notice that it is another one of those entity archetypes. We're interested in its "barcode" field.
Stat Cats
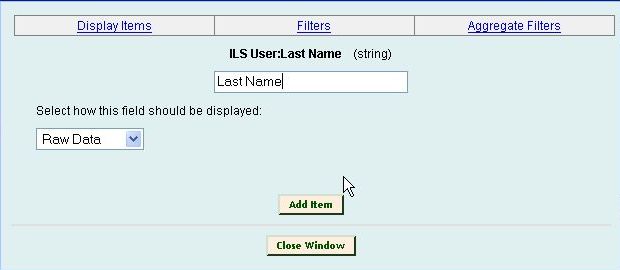
After we add that, let's click on the "Last Name" field and add it as a display item:
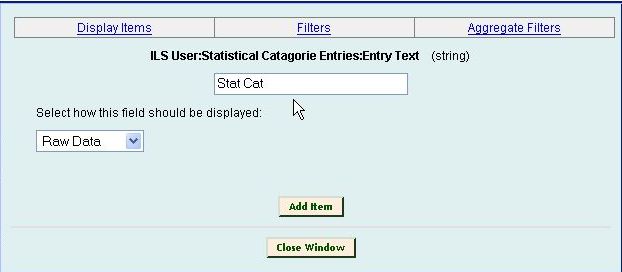
And finally, I saved the best for last. Let's add a stat cat. The field we're looking for is "Statistical Categorie Entries", which looks like a typo, so watch for that name to change slightly in the future. If we click on it, we find that it is an archetype entity. We could then click on "Entry Text" and add that as a display item:
However, we can't simply leave it at that (well, we could, but it wouldn't be a good idea). "Stastical Categorie Entries" refers to every entry for all stat cats that happen to be set on the users being selected for the report.
It's easier to illustrate:
If a hypothetical patron (matching our filter criteria) had two stat cats set on their account, say "Legacy Profile" = "Adult" and "Non-English Primary Language" = "Spanish", then they really have two entries in their "entries" field. We would get two rows in the final spreadsheet for that patron, one with the "entry text" column showing "Adult" and a second row with the column showing "Spanish". So what we need to do is filter the stat cat entries the same way we're filtering the patrons.
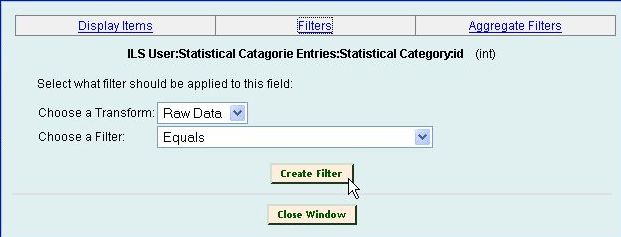
If we click on "Statistical Category", we find the archetype entity for the actual concept of a Stat Cat, which includes such things as the name of the stat cat, and all the defined entries for the stat cat. Here, we're going to try using the id-based magic filter widget, and choose "id" from under "Statistical Category".
Then when we create a report from the template, we'll get something like this:
And that will determine what goes into the "entry text" column we defined.
One gotcha here, if you filter on stat cat entries, you're effectively filtering the users as well. So if you pick "Legacy Profile" in that filter widget, you'll no longer be listing any users that lack that stat cat.
Another limitation, pending a redesign: there's no easy way to have multiple stat cat columns at the moment. However, you could do what I warned against above, and let multiple stat cats produce multiple rows. In that case, you'll want to add another display item, this one with the full path:
ILS User:Statistical Categorie Entries:Statistical Category:name
That way you'll see the name of the stat cat along with the actual entry.
At this point you would hit the "Save Template" button. We'll go over creating reports from templates elsewhere in the documentation.
For now, let's see what would have happened had we chose to summarize or count things instead of simply listing them.
Counts
If you're still working with the template from the Lists section above, go ahead and delete all the Template Filters added in that section, and all of the Display Items. Leave just the filters related to Profile and Home Library, and the Active field.
Now, let's say we're working with a data set that will give us 218 patrons if we choose Home Lib = ARL-ATH and Profile = NonResident, and we want to break down that number into subtotals, based on whether the patrons are Barred or not.
First, let's produce a column that will give us a count. What we want to count is users, but what the software will really be counting is the rows that we would get from a list report, which could include multiple rows per patron if we're not careful. So one good practice to reduce any chance of this is to use the "id" field for whatever we're counting, and then we can tell the software to count each instance of a specific id just once.
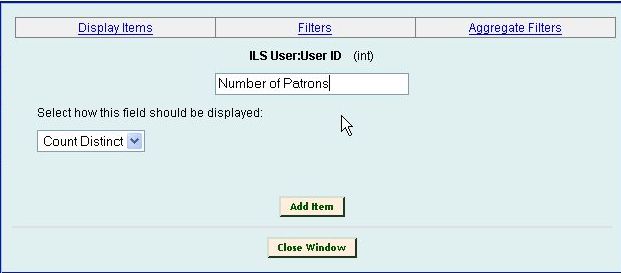
Let's click on the "User ID" field, and change the transform to "Count Distinct". The Distinct part of that transform is a safety net. 
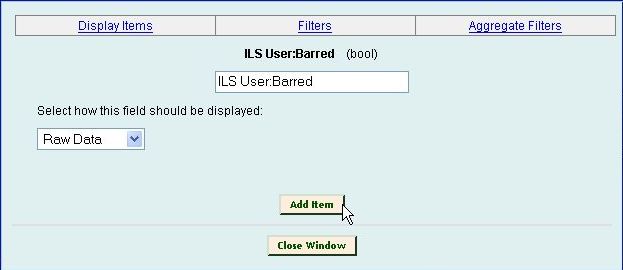
So this column will contain sub-totals. Any other columns we provide will produce extra rows based on their values. The count (sub-total) for each row will match the combination of all the other columns. Let's add a Barred column and then I'll illustrate:
Now, we have two columns for our report, one for subtotals, and one for the values of "Barred" that our selected patrons will have. Since Barred is a boolean, it only has two values, True and False. So the report so far will only have two rows at most, and that hypothetical count of 218 patrons will be separated into the counts for Barred = True and Barred = False.
It turns out for this example, there are no barred patrons with Home Lib = ARL-ATH and Profile = NonResident.
Here's the CSV output:
"Profile","Home Library","ILS User:Barred","Number of Patrons"
"NONRESIDENT","ARL-ATH","0","218"
However, if we tweak reality and say 100 of those patrons were barred, the output would look like this:
"Profile","Home Library","ILS User:Barred","Number of Patrons"
"NONRESIDENT","ARL-ATH","0","118"
"NONRESIDENT","ARL-ATH","1","100"
