
This is an old revision of the document!
Table of Contents
Git for Windows
Installation and Configuration
1. Create an SSH Key
The SSH key allows your machine to connect securely to a remote machine, which is required to push (upload) the code you modify to https://git.evergreen-ils.org where all Evergreen code is stored.
- Open up a command prompt: cmd
- Type ssh-keygen
- At the file prompt, enter: C:\Users\your-username\.ssh\id_rsa
- That path might show up as the default, in which case you can just hit Enter.
- You can leave the password blank, or you can enter a password of at least 5 digits for another layer of security.
- You should receive a confirmation. Close the command window.
- Verify that the .ssh folder and contents have been created.
- Email the C:\Users\your-username\.ssh\id_rsa.pub file to gitadmin@evergreen-ils.org and request permission to commit to the Evergreen "working" repository.
2. Install and Configure Git
Git is the software version control system that Evergreen (and many other open source software programs) uses. Git Bash is the Windows program we use on our own computer to track and package changes and interact with the main Evergreen repository. It provides a command-line interface (CLI) - there is also a Windows GUI version, but it doesn't have all of the capabilities of the CLI.
- Download and install Git for Windows from: https://git-scm.com/download/win
- Git Bash will be the program that you use the most, so you may want to add an icon to your desktop or start menu.
- Choose the option to "Use Git from the Windows Command Prompt" to allow usage of Git from both Git Bash and the command prompt.
- Choose the option to "Checkout as-is, commit Unix-style line endings" to store your modified files with the correct line ending style.
- Verify that Git is installed:
- Open Git Bash.
- At the prompt, type "git version" - Git should respond with the version that is installed
- Set up your user name and password with these commands:
git config --global user.name "FirstName LastName"
git config --global user.email "youremail@domain.com"
Navigating Within Git Bash
- pwd –> This shows you what folder you are currently in.
- cd –> This returns you to the home directory.
- cd foldername –> This moves you from the current folder to a child folder.
- cd .. –> This moves you up in the folder hierarchy one level.
- ls –> This lists all of the folders and files in the current folder.
- mkdir newfoldername –> This creates a new folder.
- Use the keyboard's "up" arrow to scroll through recent commands you've used in order to use them again.
3. Choose a Text Editor
You can use any text editor you prefer to edit code. Many Evergreen developers use Vim, which runs inside the Git Bash window. You can also use outside programs such as Visual Studio Code, Notepad, Notepad++, or any other text editor that will save flat text. You can configure Git Bash to launch your text editor from a command, or you can use the text editor outside of Git Bash. Notepad++ is used in the instructions here because it will look and act the most familiar to Windows users.
Notepad++
The instructions below are for installing and configuring Notepad++ so that it can be launched from within Git Bash. As noted above, Notepad++ is just one of the options available.
- Download and install Notepad++ from: https://notepad-plus-plus.org
- Configure your Windows environment to be able to launch Notepad++ from a command line.
- Locate the file path where the Notepad++ executable resides - usually: C:\Program Files (x86)\Notepad++
- Open the Windows Environment Variables dialog box. (Depending on your Windows version, you may be able to click Start and then type in 'environment' to open the dialog box and edit the system variables. Otherwise, follow the steps below.)
- Start > right-click on Computer > choose Properties
- Click on Advanced System Settings
- On the Advanced tab, click Environment Variables
- In the System variables section, select the Path variable and click Edit.
- At the end of the existing Path variable, type a semicolon and then enter the Notepad++ file path (found above).
- Verify that Git Bash recognizes the new command.
- Open Git Bash.
- At the prompt, type "notepad++" - this should launch the Notepad++ editor.
- Close Notepad++.
- Configure Git Bash to use Notepad++ as its default text editor.
- Open Git Bash.
- Navigate to your home directory (C:\Users\yourname).
- To view your current configuration settings, type: cat ~/.gitconfig
- To set Notepad++ as your default Git editor, type: git config --global core.editor "notepad++.exe -multiInst -nosession"
- To verify, type: git config --global --list
- To edit the configuration, type: git config --global -e
- Notepad++ should open the configuration file. Verify that your email and name are correct.
Using Notepad++ To launch a document in Notepad++ (whether it is a new document you are creating, or an existing document you wish to view or edit), navigate to the relevant folder, then enter:
notepad++ docname.txt
If you edit the document, save your changes. Then, simply close the Notepad++ window.
4. Clone the Evergreen Repository
- Create a folder to store your repositories / branches (for example, C:\Users\yourname\EGProjects).
- Open Git Bash.
- Navigate to the folder you created above.
- Type in: git clone git://git.evergreen-ils.org/Evergreen.git
- After the project is cloned, navigate into the new folder: cd Evergreen
- Type in: git remote add working git@git.evergreen-ils.org:working/Evergreen.git
- Verify that the remote paths are correct: git remote -v
- They should be:
origin git://git.evergreen-ils.org/Evergreen.git (fetch)
origin git://git.evergreen-ils.org/Evergreen.git (push)
working git@git.evergreen-ils.org:working/Evergreen.git (fetch)
working git@git.evergreen-ils.org:working/Evergreen.git (push)
If any of these lines are incorrect, correct them by using these commands:
git remote set-url origin git://git.evergreen-ils.org/Evergreen.git
#or
git remote set-url working git@git.evergreen-ils.org:working/Evergreen.git
Alternatively, you can open the configuration file and edit it directly in your text editor of choice:
notepad++ .git/config
Using Git to Create Patches
1. Update Your Local Repository
- Open Git Bash
- Navigate into your Evergreen repository
- If the master branch isn't currently checked out, check it out: git checkout master
- Before making any changes, make sure your local files are up to date with latest changes:
git pull origin master
2. Create a New Branch to Store Your Changes
Create and checkout a branch to store your changes. The branch name should be in the format: user/your-git-user-name/launchpad#_brief_description
git checkout -b user/username/lp123456_launchpad_bug_description
3. Make Your Changes
- Edit the file(s) you wish to change. You can either do this by launching a text editor from within Git Bash (notepad++ filename.tt2) or you can do so by opening and editing the file from Windows Explorer.
- Verify that Git recognizes the files you have modified: git status
- Add the file(s) you have changed to the staging area:
- To stage a specific file, use: git add myfilename.txt
- To stage all changed files, use: git add -A
- If you accidentally stage a file you didn't mean to, you can unstage it: git reset HEAD myfilename.txt
- Commit the staged changes: git commit
- When your text editor opens to write the commit message, the first line should be the launchpad number and name, followed by the description, followed by your sign off. For example:
LP#1406387 Fix for Holds Placement Advanced Options

In the staff client, when placing a hold and clicking
Advanced Hold Options, the barcode input will populate
with the staff member's barcode if it was previously
empty, regardless of whether the radio input for the
hold was specified for a patron or the staff member.

Signed-off-by:  Jane Hacker <jhacker@example.org>
4. Push Your Changes to the Evergreen Working Repo
Upload (push) your changes:
git push working user/username/lp123456_launchpad_bug_description
5. Update Launchpad
When your changes are ready for someone else to test, update the related launchpad bug:
- Get the URL for the patch you uploaded in the previous step by going to https://git.evergreen-ils.org and navigating to working/Evergreen.git.
- Scroll down under "heads" and click on the patch you uploaded.
- Copy the URL from the browser.
- In the related launchpad bug, add a comment that your patch is ready for review, along with the URL you copied.
- Add a "pullrequest" tag to the launchpad bug.
Using Git to Test Patches
1. Update Your Local Repository
- Open Git Bash
- Navigate into your Evergreen repository
- If the master branch isn't currently checked out, check it out: git checkout master
- Make sure your local repository is current: git pull origin master
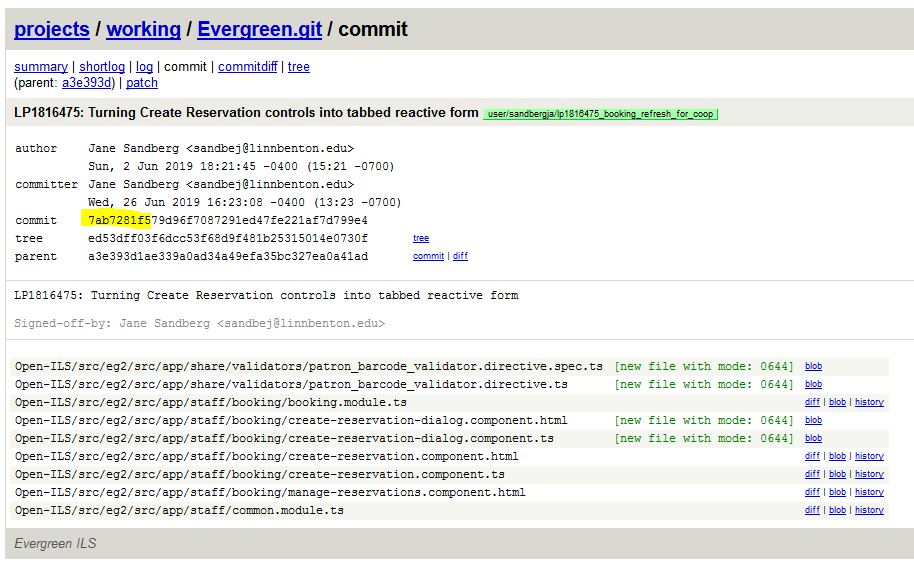
2. Identify the Commit ID for the Patch
Identify the unique commit identifier for the patch you wish to test. This is found by clicking on a link in the related launchpad bug, or navigating to https://git.evergreen-ils.org > working/Evergreen.git > clicking on the link under "heads", then clicking on the branch. Once there, copy the first 7+ characters from the unique commit code.
3. Create a Local Testing Branch
- Create and checkout a local testing branch: git checkout -b lp12345
- Pull changes into the testing branch using the unique commit id: git cherry-pick 7ab7281f5
- Test the changes on your test server.
NEED MORE INFO * If you have direct Git Bash access to your test server… Need Additional Information - how do changes get compiled? Through a git merge ? * If you do not have Git Bash access to your test server, but you have file system access to your test server through WinSCP or a similar FTP-style program, manually copy the changed files to your server for testing.
4. Create a Sign-Off Branch
If testing is not successful, update the launchpad bug report with details.
If testing is successful, acknowledge it by adding a sign-off branch:
NEED BETTER INSTRUCTIONS HERE - I still don't quite understand how to create a branch that only contains a sign-off - does it contain all the changed files AND the sign-off? Or just the sign-off?
git push working lp12345:user/my-user-name/lp12345-signoff
5. Update Launchpad
- In the relevant launchpad but, add the "signedoff" tag.
- Also, add a link in the comments to your sign-off branch.
Useful Git Bash Commands
Git Commands
- git add myfile.txt –> stage a specific file
- git add -A –> stage all modified files in the current directory and subdirectories
- git add . –> (Note the period) stage all modified files in the current directory but not subdirectories
- git branch –> list existing local branches
- git branch mynewbranch –> create a new branch
- git branch -m oldbranchname newbranchname –> change name of branch
- git branch -D branchname –> delete a local branch (cannot delete a branch you currently have checked out, so switch to different branch first)
- git checkout mybranch –> check out an existing branch
- git checkout -b mynewbranch –> create a new branch and check it out at the same time
- git checkout master –> switch to master branch
- git checkout – docname.tt2 –> resets a file you've changed back to its original state (like an undo / revert changes command)
- git clone git://git.evergreen-ils.org/Evergreen.git –> clones a remote repository
- git commit –> invoke the default text editor to add a commit message
- git commit -m "my commit message" –> add brief commit message instead of opening the text editor to add a commit message
- git commit --amend --> overwrite your last commit message * git commit <nowiki>--amend --signoff –> view and amend your sign-off branch
- git commit -a –> combine the git add and git commit steps into a single step (does not include newly created files)
- git config --global -l –> list all global configuration values
- git config --global keyname "value" –> create a global value
- git fetch --all –> refresh your local cache from the remote branches (does not download new branches)
- git help –> access the built-in Git help documentation.
- git log --oneline –> list previous commits with their unique ids
- git pull –> imports all updates from your default remote repo to your default local repo (usually, this is equivalent to 'git pull origin master')
- git pull origin master –> import all updates from remote origin repo to local master repo
- git pull --rebase origin master –> rebases (rather than merges) new remote changes to your local repository
- git push working mybranchname –> push changes to the remote working directory
- git push working --delete mybranchname –> delete a remote branch
- git remote -v –> display remote directories
- git reset HEAD myfile.txt –> unstage a file that has already been staged
- git reset --hard –> reset a current branch to its original state
- git rm badfile.txt –> delete a file (if the file is being tracked, be sure to add a commit message indicating the file has been deleted)
- git show --stat –> see what your commit will look like before you push it
- git status –> display status of current branch
- git version –> displays the installed version of Git
Other Commands
- cd –> move back to the home folder
- cd foldername –> move from the current folder to a child folder
- cd .. –> move up in the folder hierarchy one level
- clear –> clears your command window giving you a fresh screen to work with
- ls –> list all of the folders and files in the current folder
- mkdir newfoldername –> create a new folder
- notepad++ newdocname.txt –> create a new file and open it in notepad++
- notepad++ docname.txt –> edit an existing file in notepad++
- pwd –> see what folder you are currently in