
This is an old revision of the document!
Table of Contents
Git for Windows
Using Git to Test Patches
1. Update Your Local Repository
- Open Git Bash
- Navigate into your Evergreen repository
- If the master branch isn't currently checked out, check it out: git checkout master
- Make sure your local repository is current: git pull origin master
2. Identify the Commit ID for the Patch
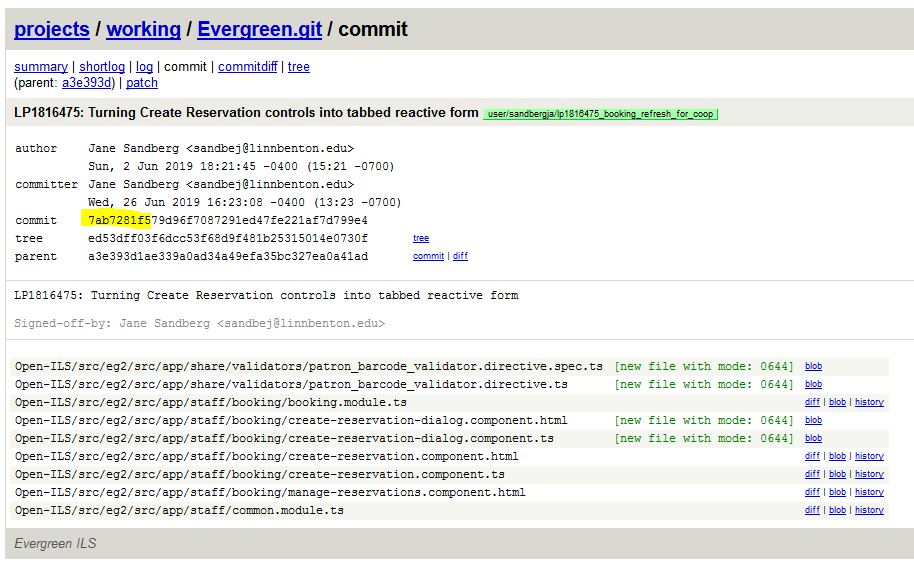
Identify the unique commit identifier for the patch you wish to test. This is found by clicking on a link in the related launchpad bug, or navigating to https://git.evergreen-ils.org > working/Evergreen.git > clicking on the link under "heads", then clicking on the branch. Once there, copy the first 7+ characters from the unique commit code.
3. Create a Local Testing Branch
- Create and checkout a local testing branch: git checkout -b lp12345
- Pull changes into the testing branch using the unique commit id: git cherry-pick 7ab7281f5
- Test the changes on your test server.
NEED MORE INFO * If you have direct Git Bash access to your test server… Need Additional Information - how do changes get compiled? Through a git merge ? * If you do not have Git Bash access to your test server, but you have file system access to your test server through WinSCP or a similar FTP-style program, manually copy the changed files to your server for testing.
4. Create a Sign-Off Branch
If testing is not successful, update the launchpad bug report with details.
If testing is successful, acknowledge it by adding a sign-off branch.