
This is an old revision of the document!
Table of Contents
Git for Windows
Using Git to Test Patches
Get the Commit Hash
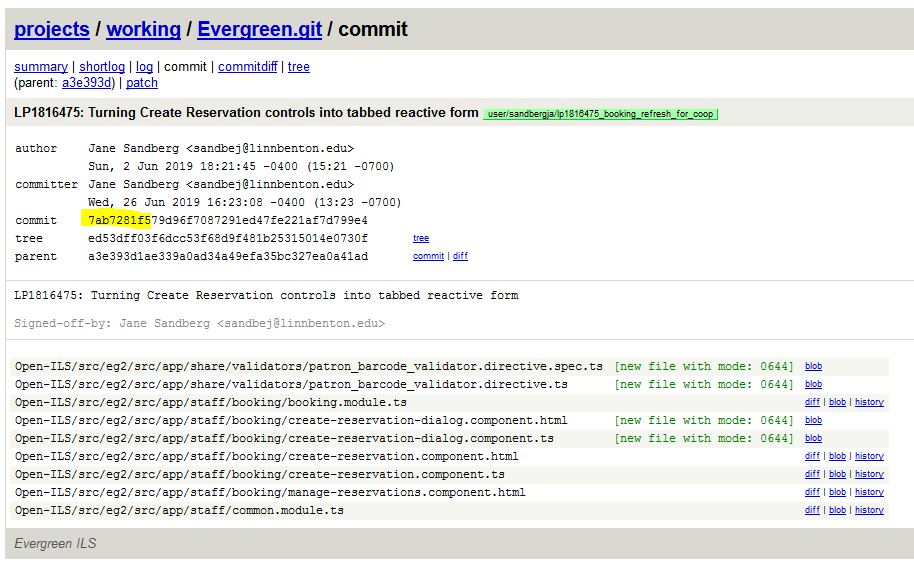
First, you will need to identify the unique commit ID (hash) of the patch you wish to test. This is found by clicking on a link in the related launchpad bug, or navigating to https://git.evergreen-ils.org > working/Evergreen.git > clicking on the link under "heads", then clicking on the branch. Once there, copy the first 7+ characters from the unique commit code.
Load the Patch to Your Test Server
The next steps will be somewhat different depending on whether you have direct access to a test server that has Git installed or whether you have file access via WinSCP or another file transfer program.
Option A: Testing When You Have File Access
A1. Update Your Local Repository
- Open Git Bash on your computer.
- Navigate into your Evergreen repository.
- If the master branch isn't currently checked out, check it out: git checkout master
- Make sure your local repository is current: git pull
A2. Create a Testing Branch
- Create and checkout a local testing branch: git checkout -b lp12345_branch_name
- This branch does not have to have the same name as the branch you will be testing, but it makes it easier to keep track of.
- Pull changes into the testing branch using the unique commit id: git cherry-pick 7ab7281f5
A3. Upload Changed Files
Using WinSCP (or your other FTP-style program), transfer each of the changed files in the patch from your local repository to the related 'installed' locations on the server. (See https://wiki.evergreen-ils.org/doku.php?id=newdevs:landscape:tree
Option B: Testing When You Have Direct Git Access to Your Test Server
Note: Your test server does not need to have an SSH key if you are just pulling branches for testing. Instead, you can set up your connection to the remote working repo as read-only: git://git.evergreen-ils.org:working/Evergreen.git
B1. Update Your Repository
- Open Git Bash on the server as the root user.
- Navigate into your Evergreen repository.
- If the master branch isn't currently checked out, check it out: git checkout master
- Make sure your local repository is current: git pull
B2. Create a Testing Branch
- Create and checkout a local testing branch: git checkout -b lp12345_branch_name
- This branch does not have to have the same name as the branch you will be testing, but it makes it easier to keep track of.
- Pull changes into the testing branch using the unique commit id: git cherry-pick 7ab7281f5
B3. Upload Changed Files
Using WinSCP (or your other FTP-style program), transfer each of the changed files in the patch from your local repository to the related 'installed' locations on the server. (See https://wiki.evergreen-ils.org/doku.php?id=newdevs:landscape:tree
Test
Test everything thoroughly to be sure it solves the problem that the developer wanted to solve. Be sure to test any other related pages/features to be sure that the new changes do not break any existing functionality.
Create a Sign-Off Branch
If testing is not successful, update the launchpad bug report with details.
If testing is successful, acknowledge it by adding a sign-off branch.